Category Archives: Administration

Fix weak Diffie-Hellman (DH) key exchange parameters.

This will fix security vulnerability called Logjam. In short the vulnerability allow man-in-the-middle attack by downgrading TLS connection and manipulating data. You can find full disclosure here.

The solution bellow is just for Nginx, because currently I don’t Apache anywhere right now and I don’t care, but should be pretty easy to do on Apache as well. Also you should fix all other services which are using SSL like FTP, Mail etc.

First check if you have the directory

/etc/ssl/private

If you don’t have it, you will need to create it, and change it’s permissions:

mkdir -p /etc/ssl/private
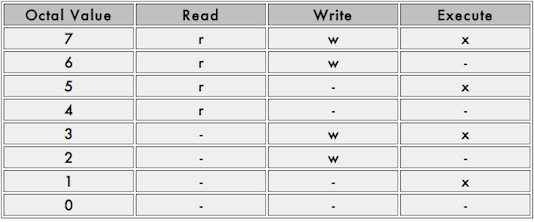
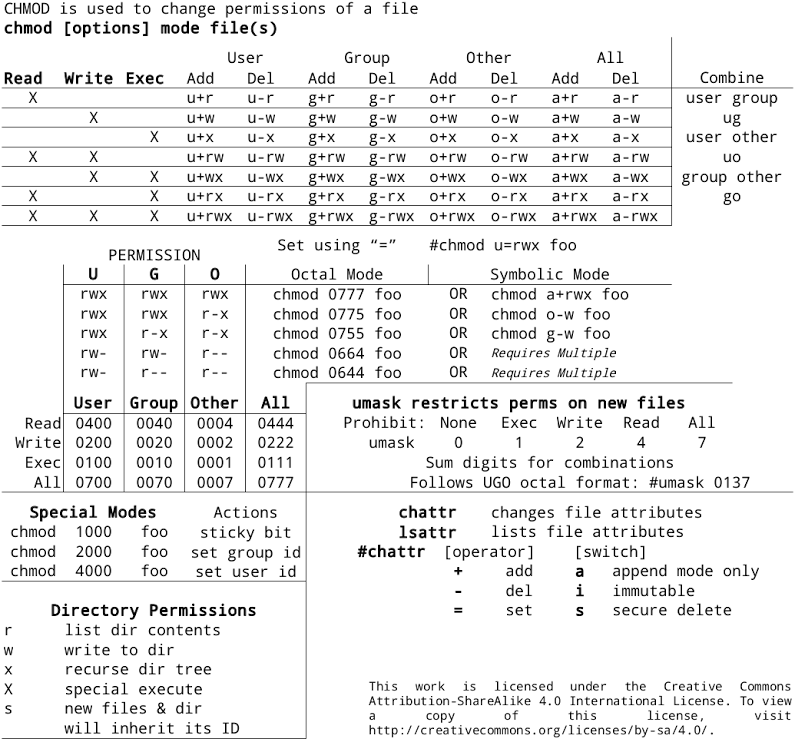
chmod 710 /etc/ssl/private

Then you need to create DH parameter file, and change the permissions:

cd /etc/ssl/private
openssl dhparam -out dhparams.pem 2048
chmod 600 dhparams.pem

Be patient as this might take a little while, and will consume your CPU.
It was few minutes in my case.

Now you need to edit few things in the nginx config file:

nano /etc/nginx/nginx.conf

Replace or add the fallowing to the httpd section:

ssl_ciphers 'ECDHE-RSA-AES128-GCM-SHA256:ECDHE-ECDSA-AES128-GCM-SHA256:ECDHE-RSA-AES256-GCM-SHA384:ECDHE-ECDSA-AES256-GCM-SHA384:DHE-RSA-AES128-GCM-SHA256:DHE-DSS-AES128-GCM-SHA256:kEDH+AESGCM:ECDHE-RSA-AES128-SHA256:ECDHE-ECDSA-AES128-SHA256:ECDHE-RSA-AES128-SHA:ECDHE-ECDSA-AES128-SHA:ECDHE-RSA-AES256-SHA384:ECDHE-ECDSA-AES256-SHA384:ECDHE-RSA-AES256-SHA:ECDHE-ECDSA-AES256-SHA:DHE-RSA-AES128-SHA256:DHE-RSA-AES128-SHA:DHE-DSS-AES128-SHA256:DHE-RSA-AES256-SHA256:DHE-DSS-AES256-SHA:DHE-RSA-AES256-SHA:AES128-GCM-SHA256:AES256-GCM-SHA384:AES128-SHA256:AES256-SHA256:AES128-SHA:AES256-SHA:AES:CAMELLIA:DES-CBC3-SHA:!aNULL:!eNULL:!EXPORT:!DES:!RC4:!MD5:!PSK:!aECDH:!EDH-DSS-DES-CBC3-SHA:!EDH-RSA-DES-CBC3-SHA:!KRB5-DES-CBC3-SHA';

and then add the fallowing two lines:

ssl_prefer_server_ciphers on;
ssl_dhparam /etc/ssl/private/dhparams.pem;

Run configtest to see if you forgot some semicolon:

service nginx configtest

and if it says it is OK, you can restart it.
Check the number of active connections on port 80

If you want to quickly check the number of the active connections on your server you can run this command:

netstat -anp | grep :80 | grep ESTABLISHED | wc -l

Don’t forget the semi-colon.
This will work also for all other ports for example SSH on the default 22, or HTTPS on 443.

And this one will list the number of the active connections per IP sorted

netstat -ntu | grep :80 | grep -v LISTEN | awk '{print $5}' | cut -d: -f1 | sort | uniq -c | sort -rn 

Chroot sftp user/group directory.

This is a simple reference to chroot a sftp user or group to a folder – usually the web server folder. It is not covered “full” chrooting.

Edit /etc/ssh/sshd_config (/etc/sshd_config on some distributions) and set the following options:

#Subsystem sftp internal-sftp
#In some cases you might need to uncomment the line above and comment existing #Susbsytem option 
#Match user sftp-user
Match group sftp
ChrootDirectory /var/www
ForceCommand internal-sftp
AllowTcpForwarding no

Be sure to place the “Match” directive at the end of the file. This tells OpenSSH that all users in the sftp group are to be chrooted to their home directory (which %h represents in the ChrootDirectory command – you can use it instead of “/var/www” in this case), or any other you specify.

Don’t leave two or more Subsytem sftp directives at the same time – use only one. Otherwise you wont be able to access the server from ssh!

For any users that you wish to chroot, add them to the sftp group by using:

# usermod -G sftp paul
# usermod -s /bin/false paul
# chown root:root /home/paul
# chmod 0755 /home/paul

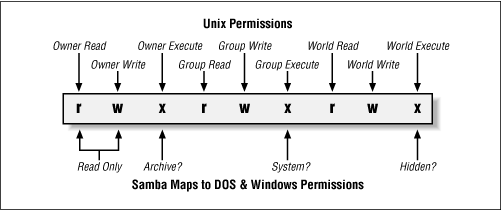
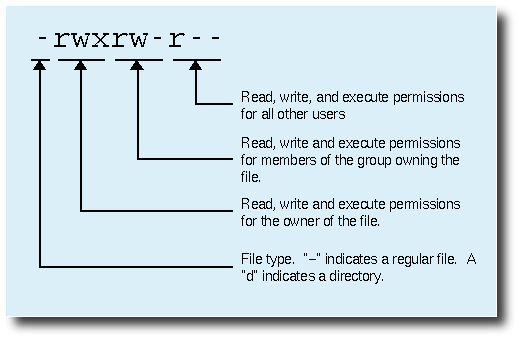
If you still have problems it is most probably because of directory permissions or/and ownership – you can try this:


sudo chown root /var/www
sudo chmod go-w /var/www
sudo mkdir /var/www/writeable
sudo chown bob:sftponly /var/www/writeable
sudo chmod ug+rwX /var/www/writeable

Be very careful as changes to sshd_config might leave you without ssh and sftp access to the server!!!

Check System Load and restart services


#!/bin/sh
# script to check server for extremely high load and restart Apache/Nginx/Varnish/MySQL if the cond$
check=`cat /proc/loadavg | sed 's/\./ /' | awk '{print $1}'`
# define max load avarage when script is triggered
max_load='9'
# log file
high_load_log='/var/log/server_high_load_restart.log';
#
if [ $check -gt "$max_load" ]; then
service nginx restart
sleep 5;
service php5-fpm restart
sleep 5;
service varnish restart
echo "$(date) : Server Restart due to excessive load | $check |" >> $high_load_$
fi


Shell VPS Backup Script

This script uses rsync and ssh keys over ssh to backup remote server with anacron, it should work with cron too, but it haven’t been tested.


#!/bin/sh
#Script for VPS back ups

#This is for the desktop notification on Ubuntu
notify-send -i drive-multidisk Rsync "VPS Backup Started"

#This is for the reallusion VPS
rsync -e "ssh -i /home/user/.ssh/id_rsa.2 -p 104" -rtv --delete root@domain.com:/home /mnt/DATA-L/backups
rsync -e "ssh -i /home/user/.ssh/id_rsa.2 -p 104" -rtv --delete root@domain.com:/etc /mnt/DATA-L/backups
rsync -e "ssh -i /home/user/.ssh/id_rsa.2 -p 104" -rtv --delete root@domain.com:/var/log /mnt/DATA-L/backups
rsync -e "ssh -i /home/user/.ssh/id_rsa.2 -p 104" -rtv --delete root@domain.com:/var/mail /mnt/DATA-L/backups
rsync -e "ssh -i /home/user/.ssh/id_rsa.2 -p 104" -rtv --delete root@domain.com:/var/backups /mnt/DATA-L/backups

#This is for the desktop notification on Ubuntu
notify-send -i drive-multidisk Rsync "VPS Backup Finished"

Shell Script to check system load and send e-mail

This script can check the sytem load with cronjob and send email or even SMS if the load is too high. Anyway I preffer using monit. Tested with ubuntu.

#!/bin/bash
#Load Monitor - sends email when the sytem load reach 5.00, and sms when reach 9.
#first {print$10} check for the last 5 min load, replace with 9 to check for 1 min and 11 for 15 min.

LOAD=`uptime | tr ' ' ' ' | awk '{print$10}' | tr '.' ' ' | awk '{print$1}'`

if [ $LOAD -ge "2" ];
then
    echo "High Load: $LOAD" | mail -s "Load Alert" your@email.com
fi

if [ $LOAD -ge "5" ];
then
    echo "High Load: $LOAD" | mail -s "Load Alert" yourphonenumber@sms.mtel.net
fi

Shell backup script

Script to backup the web dorectory and mysql databases. Tested on ubuntu with cronjob every week.

#!/bin/bash
#=======================================================================================================================
# VPS Backup Script by Ivan Denkov
#=======================================================================================================================
DATE=$(date +"%Y-%m-%d")
MYSQLDUMP="$(which mysqldump)"
TAR="$(which tar)"
PASS="MySQLPSWD"
DIR="/home/backups"
DBS=`mysql -u root -h localhost -p$PASS -e"show databases"`
UPTIME=`uptime`
FREEHD=`df -h`

#This will remove files older than 35 days
find $DIR/* -mtime +35 -exec rm -rf {} \;

$TAR -cvf $DIR/Backup-$DATE.tar /var/www
for DATABASE in $DBS
do
if [ $DATABASE != "Database" ]; then
FILENAME=$DATABASE
$MYSQLDUMP -u root -h localhost -p$PASS $DATABASE > $DIR/$FILENAME.sql
$TAR -rvf $DIR/Backup-$DATE.tar $DIR/$FILENAME.sql
fi
done

#Remove dumped .sql in the folder
rm -rf $DIR/*.sql

sleep 40

#send me e-mail when done
echo "Email Body - Back Up completed at date $DATE, or maybe not!? Let see the statistic \n\n $UPTIME \n\n  $FREEHD" | mail -s "Email Subject - Back UP $DATE" your@email.com

Kill and Logout users in pts/* Linux

As a  Linux administrator you may need to force logout and kill a specific user, or an active user in pts/0 pts/1 pts/3 etc. Also this tutorial will work in most linux distros.
First of all display the out put of “w” command.

[root@server ~#]w
18:08:30 up 3:54, 3 users, load average: 0.05, 0.02, 0.00
USER TTY FROM LOGIN@ IDLE JCPU PCPU WHAT
root pts/0 192.168.10.100 14:15 0.00s 0.05s 0.01s w
james pts/1 192.168.10.100 18:07 50.00s 0.02s 0.02s -bash
james pts/2 10.10.20.23 18:07 39.00s 0.02s 0.02s -bash

Here the user “james” is logged in from two different machines. And you need to force logout and kill the user “james” logged in from ip: 192.168.10.100 (pts/1)

use the below command

[root@server ~#]skill -KILL -v pts/1

This command will force logout and kill the user in pts/1. and the same user logged in pts/2 will not be logged out.

If need to kill a users all the connected sessions at once

[root@server ~#]skill -KILL -u james

(this will kill both pts/1 and pts/2 cessions)

To STOP/PAUSE a user’s activities

[root@server ~#]skill -STOP -u james

To RESUME a stopped user

[root@server ~#]skill -CONT -u james

Edit

There is some bug in recent Debian(7) and distros based on them like Ubuntu, which will make the command

skill -KILL -v pts/1

do nothing

What you can do in such case is to get the PID of the terminal you want to kill with

 skill -i -t pts/1

it will return something like

pts/1    root     27933 bash               ?

Just kill it –

kill 27933