Category Archives: Ubuntu

Enable Wake On Lan (WoL) on Ubuntu 16.04

If you have bought crappy motherboard from gigabyte like me that doesn’t even have support for WoL in the BIOS, and no-brand ethernet for which even the manufacturer can’t tell you if it support WoL(such unique feature!), then you will have to buy additional NIC, and add few line to the file:

/etc/network/interfaces

and add the following

auto enp3s0
iface enp3s0 inet dhcp
	up ethtool -s enp3s0 wol g

where enp3s0 is your interface name.

Or you can just buy yourself something decent.

Convert AWS .ppk key to .pem openSSH

I had to deal recently with AWS instance, and I was provided only with .ppk key, which is not not exaclty compatible with openSSH.
You can use PuTTY under Linux, but this thing looks really awful, if you think I am being pretentious just take a look at this garbage:

So what you need to do is to use

puttygen

which comes with PuTTY.

You will have to install with your package manager PuTTY, it should be available in yout repos, as it is fairly popular package.

I am using Ubuntu so for me that would be:

sudo apt-get install putty

Navigate to the folder where your .ppk key is and generate .pem key:

puttygen aws.ppk -O private-openssh -o aws.pem

Move it to your .ssh filder where all the other keys are and change key permissions:

sudo chown 400 .ssh/aws.pem 

And then connect specifying that you want to use your with the -i option:

ssh -i .ssh/aws.pem ubuntu@ec2-21-000-12-37.compute-1.amazonaws.com

Just be careful about the key path, and typos and it should be fine.

Install PHP 7 on Ubuntu

Note: This “guide” was meant for Ubuntu 14.04, I haven’t tested it on 16.04 and it most probably will not work, so please do not attempt to use it at all. I doubt that it would even work on 14.04 fallowing this guide.

You can refer to this guide for php7 with apache2 – Ubuntu 16.04 – Install Apache2 and php7

If you want to try the new php7 which GA release (General availability) is about to be finished in mid October, you can fallow these instructions.

I have done this little experiment on a virtual machine, and I strongly advice for you to do the same. But if you have balls go and do it on a production server.

Usually you will need to download and compile the packages on your system, but since I am lazy I searched for a ppa, and seems Ondřej Surý was kind enough to compile them, put them on ppa, and update them regularly.
This is the ppa – https://launchpad.net/~ondrej/+archive/ubuntu/php

I actually had php5 and apache running on this virtual instance, so even before adding the ppa, you need to remove everything php5 related, otherwise you might have conflicts and problems like me:

sudo apt-get remove php5*

Then add the php7 ppa:

sudo add-apt-repository ppa:ondrej/php

run update:

sudo apt-get update

and install php7:

sudo apt-get install php7.0

For apache you will need to enable php7 mod with:

sudo a2enmod php7.0

disable php5 mod (if you had php5 in the first place):

sudo a2dismod php5

Restart apache:

sudo service apache2 restart

and you are good to go.

You can put a file with

<!--?php phpinfo(); ?-->

and take a look at your brand new php7 install.

After that I decided to run a simple test to see if php7 is really that much faster than php5, and run on two identical VM’s the script from http://www.php-benchmark-script.com/.

PHP 5

--------------------------------------
| PHP BENCHMARK SCRIPT |
--------------------------------------
Start : 2015-09-20 01:24:52
Server : localhost@192.168.1.139
PHP version : 5.5.9-1ubuntu4.11
Platform : Linux
--------------------------------------
test_math : 0.856 sec.
test_stringmanipulation : 0.923 sec.
test_loops : 0.540 sec.
test_ifelse : 0.427 sec.
--------------------------------------
Total time: : 2.746 sec.

PHP 7

--------------------------------------
| PHP BENCHMARK SCRIPT |
--------------------------------------
Start : 2015-09-20 01:24:55
Server : ubuntu-server@192.168.1.109
PHP version : 7.0.0RC3
Platform : Linux
--------------------------------------
test_math : 0.225 sec.
test_stringmanipulation : 0.338 sec.
test_loops : 0.224 sec.
test_ifelse : 0.267 sec.
--------------------------------------
Total time: : 1.054 sec.

Change loopback interface IP address

First of all – I know that is not a good idea, and the world will end if for some reason I want to change our beloved home address.
But for a second there, just think that there is situations when you need this.

In my case I wanted to test some different IP’s against database – and that is the easiest way to give myself any IP address I want, from any country I want, while running the script on the same machine.

Actually it is pretty straight forward solution – but everywhere on the internet when someone ask this a bunch of people are starting to suggest some other solutions – adding another interface, telling them they don’t need to do that etc.
Here is how to assign any IP address to the loopback interface in linux.

You will need root permissions, or just run the commands with sudo. Also this is tested on Ubuntu

For example we gonna use the IP address 46.10.11.185
First we need to change hosts file with:

sudo nano /etc/hosts

Just change your home(127.0.0.1) with 46.10.11.185 in the beginning of the file, so it is going to look something like this:

46.10.11.185 localhost
127.0.0.1 ivan-T430

Then just use ifconfig to change the lo interface IP address with:

sudo ifconfig lo 46.10.11.185

That’s all. Now your local web server will see you as the IP you want.

This is potentially dangerous, and might even make your system unstable.
Make sure you revert all changes and you put back the correct lo IP!

Count the visitors from the access log

Sometimes is handy to see what number of visitors you had on you site/server based on the access log – in this case Nginx access log. This will count every different IP, so a chunk of these visitors will be bots.


grep "\[13/Jul/2015" /var/log/nginx/access.log | cut -d" " -f1 | sort | uniq | wc -l

Another slightly different variation

cat access_log | awk '{print $1}' | sort | uniq -c | sort -n | tail

Thinkpad T430 fan control – Ubuntu 14.04

After researching for a few hours online to find a guide on how to control my Thinkpad’s fan speed I realized that the new models have some differences from previous models and the guides available are not complete if not wrong. So, I am making this tutorial for anyone that has a new Thinkpad ( x30/x20 models ) and needs to control his fan in order to keep the noise down and get more battery life.

Every step below uses the terminal so open an instance with the combination CRTL + ALT + T

The first thing we will do is to install a program that will provide us information about the sensors of the laptop and their temperatures

sudo apt-get install lm-sensors

Configure the application in order to find every available sensor

sudo sensors-detect

Answer Yes to every question and the last confirmation for saving the changes made.
Install thinkfan which is our main program

sudo apt-get install thinkfan

Add the coretemp module to the startup list. It will provide us the temperature inputs.

echo coretemp >> /etc/modules

Load the coretemp module

sudo modprobe coretemp

The next step is to find your temperature inputs so take note the results of the following command

sudo find /sys/devices -type f -name "temp*_input"

If you don’t get any outputs ( similar to the next step ) please Reboot and continue from this step.

It’s time to edit our thinkfan configuration

sudo gedit /etc/thinkfan.conf

Go to the line where it says #sensor /proc/acpi/ibm/thermal … and below that line ( which should be commented since thermal is not supported in the new thinkpads ) insert something like the following:

sensor /sys/devices/platform/coretemp.0/temp1_input
sensor /sys/devices/platform/coretemp.0/temp2_input
sensor /sys/devices/platform/coretemp.0/temp3_input
sensor /sys/devices/virtual/hwmon/hwmon0/temp1_input

The above lines are the results from Step 5 prefixed with ‘sensor ‘.

Time to set the temperature rules. The format is: ( FAN_LEVEL, LOW_TEMP, HIGH_TEMP ) meaning that each FAN_LEVEL will start when the highest temperature reported by all the sensors meets its LOW_TEMP and if it surpasses its HIGH_TEMP it will go to the next FAN_LEVEL rule. If it goes below the LOW_TEMP it will fallback to the previous FAN_LEVEL rule. Please take notice that the HIGH_TEMP of a rule must be between the LOW_TEMP & HIGH_TEMP of the rule that follows.
My settings are:

#(FAN_LEVEL, LOW, HIGH)
(0, 0, 60)
(1, 57, 63)
(2, 60, 66)
(3, 64, 68)
(4, 66, 72)
(5, 70, 74)
(7, 72, 32767)

NOTE: I am not responsible for any problems you encounter with these rules. They are fine as per my configuration so please test them before using them and if necessary adjust them to your needs.

Now, we must add a configuration file into the modprobe.d

sudo echo "options thinkpad_acpi fan_control=1" >> /etc/modprobe.d/thinkpad.conf

If you want to start thinkfan automatically at boot-time please type the following

sudo gedit /etc/default/thinkfan

Change the line START=no to START=yes. If the line does not exist add it yourself.

RESTART your laptop and everything should work as expected. Test your laptop’s temperatures ( using sensors command ) under different workloads and verify that the fan speed is as per the rules you defined.

If you encounter a typing mistake or a step not working for you please comment below. On the contrary if everything works then comment below verifying the guide.


This information was taken from here – http://mastergenius.net/wordpress/2012/07/20/control-your-thinkpad-t430-fan-speed-in-ubuntu-12-04/

The time I need it the site was trowing Nginx errors, so I had to use time machine to get it.
The fallowing was tested on ThinkPad T430 with Ubuntu Mate, and it still works without any problems.
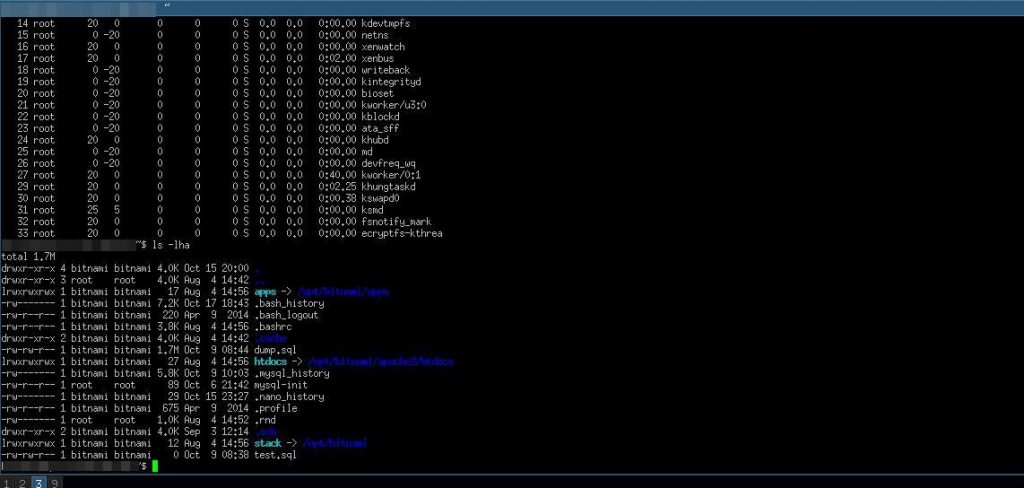
 

Chroot sftp user/group directory.

This is a simple reference to chroot a sftp user or group to a folder – usually the web server folder. It is not covered “full” chrooting.

Edit /etc/ssh/sshd_config (/etc/sshd_config on some distributions) and set the following options:

#Subsystem sftp internal-sftp
#In some cases you might need to uncomment the line above and comment existing #Susbsytem option 
#Match user sftp-user
Match group sftp
ChrootDirectory /var/www
ForceCommand internal-sftp
AllowTcpForwarding no

Be sure to place the “Match” directive at the end of the file. This tells OpenSSH that all users in the sftp group are to be chrooted to their home directory (which %h represents in the ChrootDirectory command – you can use it instead of “/var/www” in this case), or any other you specify.

Don’t leave two or more Subsytem sftp directives at the same time – use only one. Otherwise you wont be able to access the server from ssh!

For any users that you wish to chroot, add them to the sftp group by using:

# usermod -G sftp paul
# usermod -s /bin/false paul
# chown root:root /home/paul
# chmod 0755 /home/paul

If you still have problems it is most probably because of directory permissions or/and ownership – you can try this:


sudo chown root /var/www
sudo chmod go-w /var/www
sudo mkdir /var/www/writeable
sudo chown bob:sftponly /var/www/writeable
sudo chmod ug+rwX /var/www/writeable

Be very careful as changes to sshd_config might leave you without ssh and sftp access to the server!!!

Defragment ext4

ext4 filesystems are not actually fragment-proof, however they fragment the drives a lot less than ntfs for example, you can use

e4defrag

Option c will check if defragment is need, and then you can run it with v
Example:

 sudo e4defrag -v <filename or mount point of ext4 drive> 

Manual page